
Tips for Making Faux Floral Centerpieces
This post may contain affiliate links which means I may receive a commission for purchases made through links. Learn more on my Privacy Policy Page.
Florals and stems are a great way to soften a space and add some movement, and one of my personal favorite ways to bring in color with my decorating.

As a young girl, I remember watching my mom create the most beautiful faux floral arrangements. I would watch as she positioned each stem strategically, bringing all the individual pieces together to create the final centerpiece.
Today, creating beautiful and unique centerpieces and arrangements has become the icing on the cake for me when I am styling a space - an essential step that makes the look complete and adds a touch of something special.
I’ve talked before on the blog about how I prefer the convenience of faux florals/stems in our home, and creating a realistic looking arrangement is always my goal.
Read on for my 5 tips for creating faux floral centerpieces:
Selecting the right florals and stems. My first tip is actually something I dedicate an entire blog post to talking about.
Creating a realistic arrangement doesn’t happen by chance and for me, selecting the right florals and stems from the start is crucial. Find out my tips for what to look for when sourcing your florals and stems here:
2. Selecting the right size vase. It may seem obvious, but it’s worth mentioning that different styles of vases will give your centerpiece a different look overall.
When I am styling a centerpiece for a dining room table, for example, I typically like to use a shorter vase. Why? Proportionately, a shorter and wider vase will look best with shorter florals/stems, and for a dining room table, you don’t want your centerpiece too tall because it could block sight lines.
Similarly, when I am styling an arrangement for a fireplace or console table, I typically like to use a taller vase and taller stems because it helps to connect the entire look.
When styling your space, consider how tall or wide you want the full arrangement to be (including the vase and stems). This will help you choose the right size vase with the right proportions.
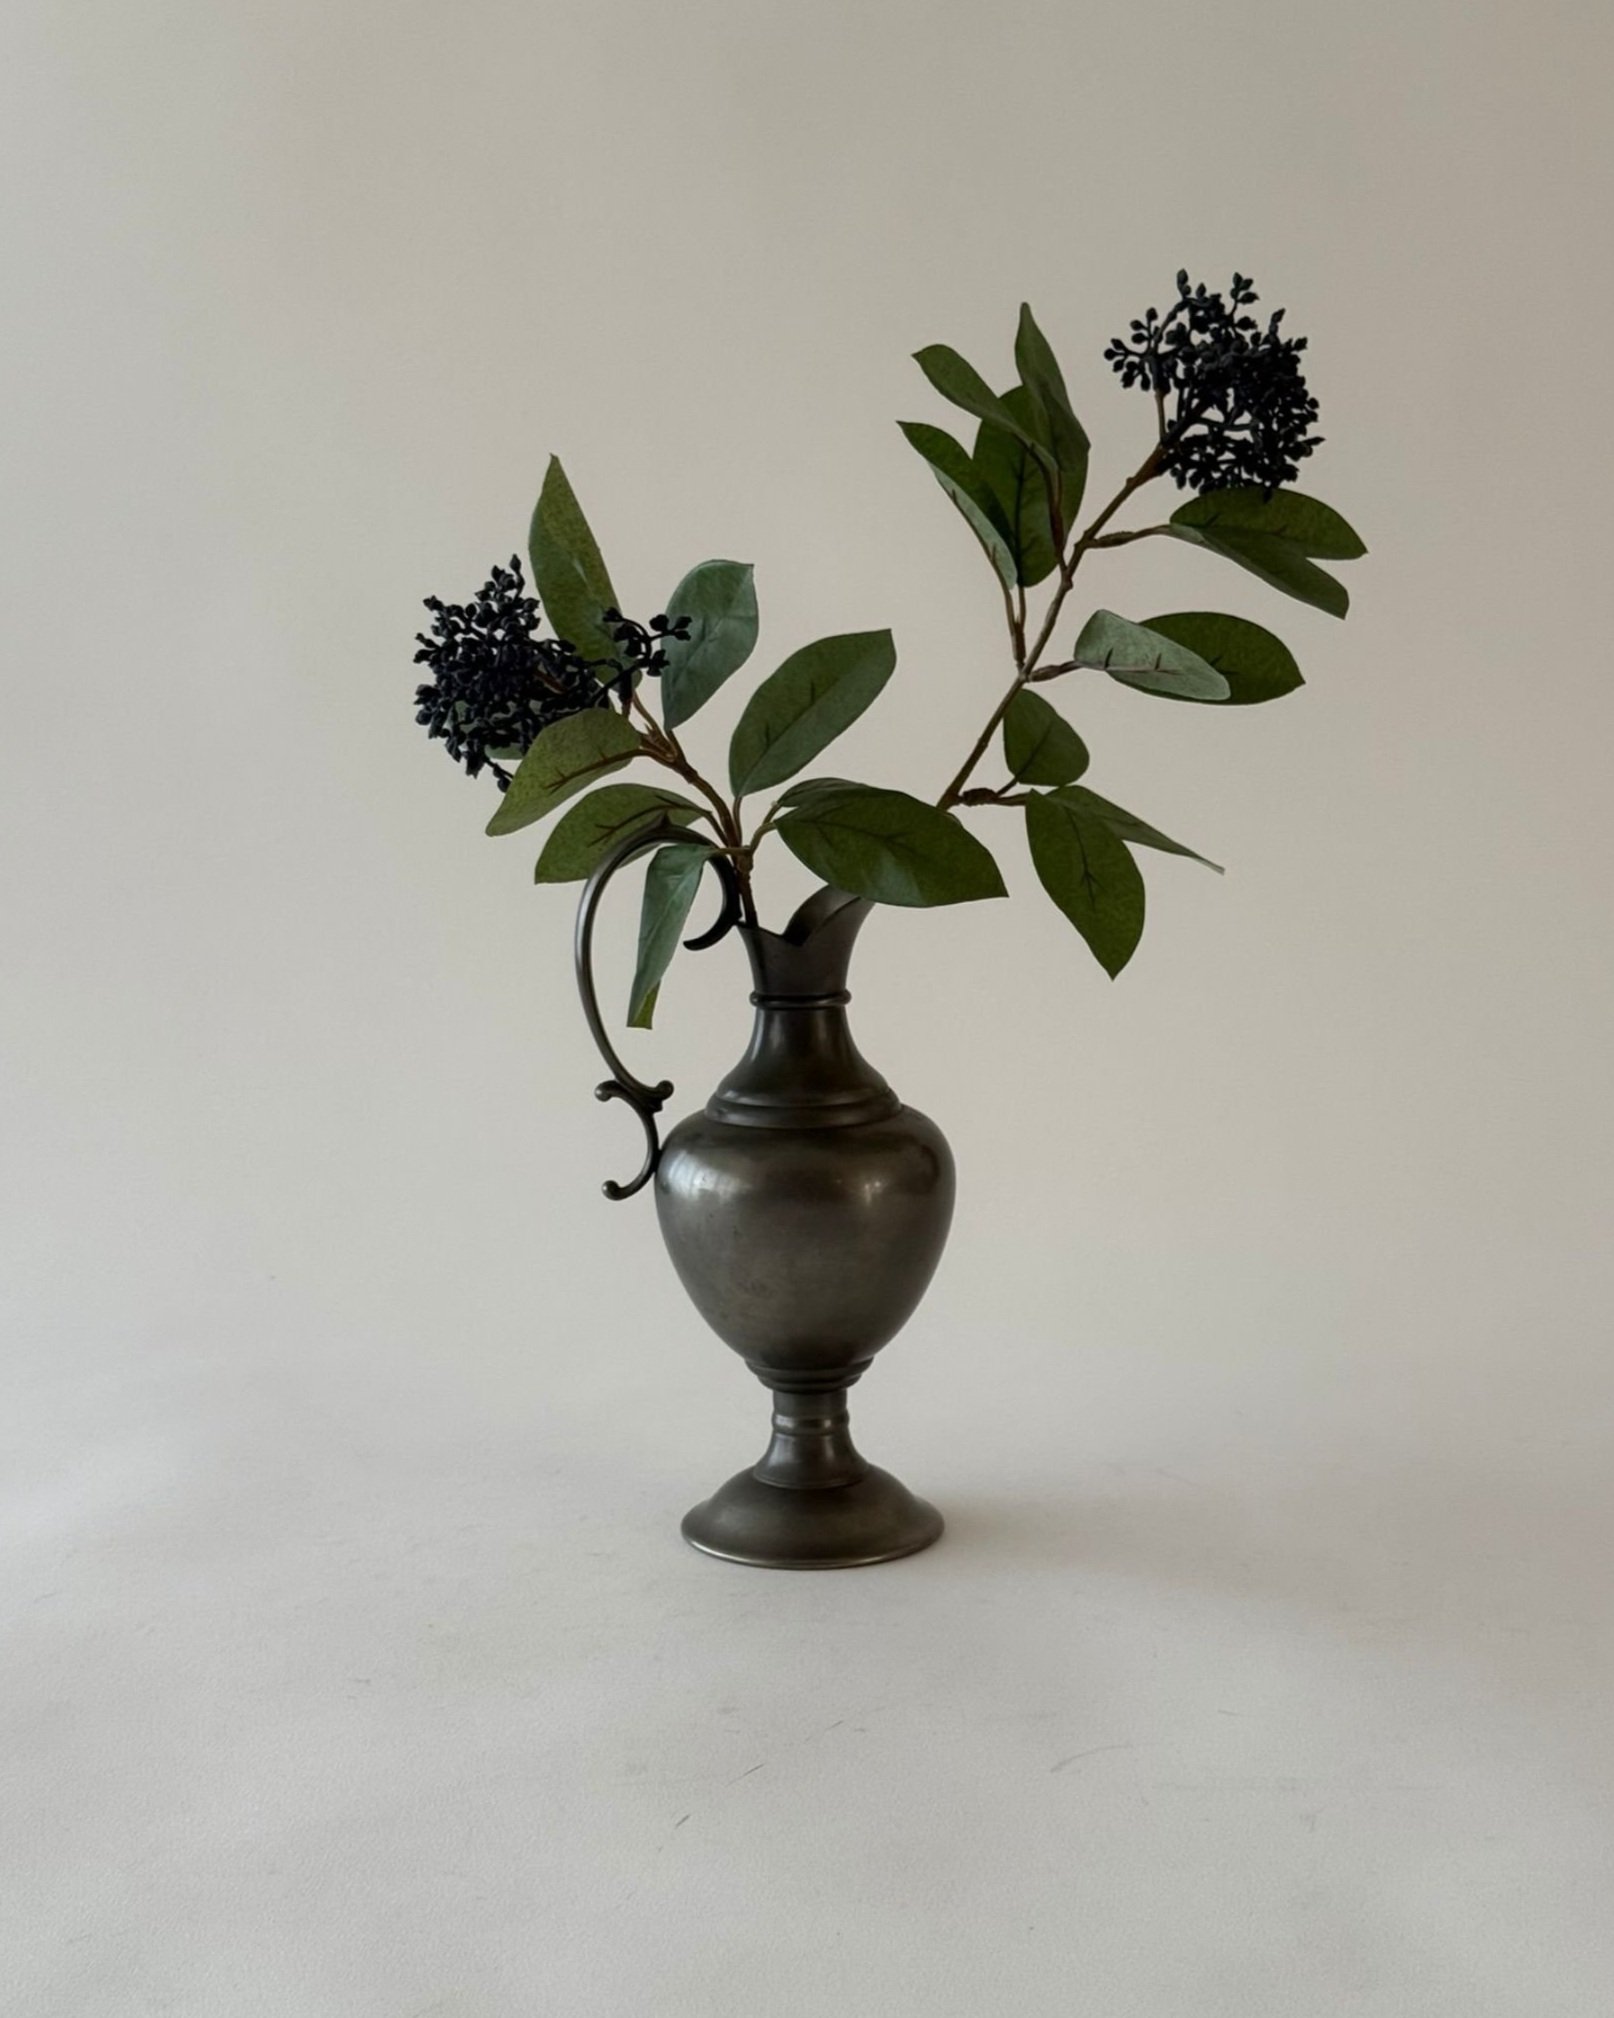
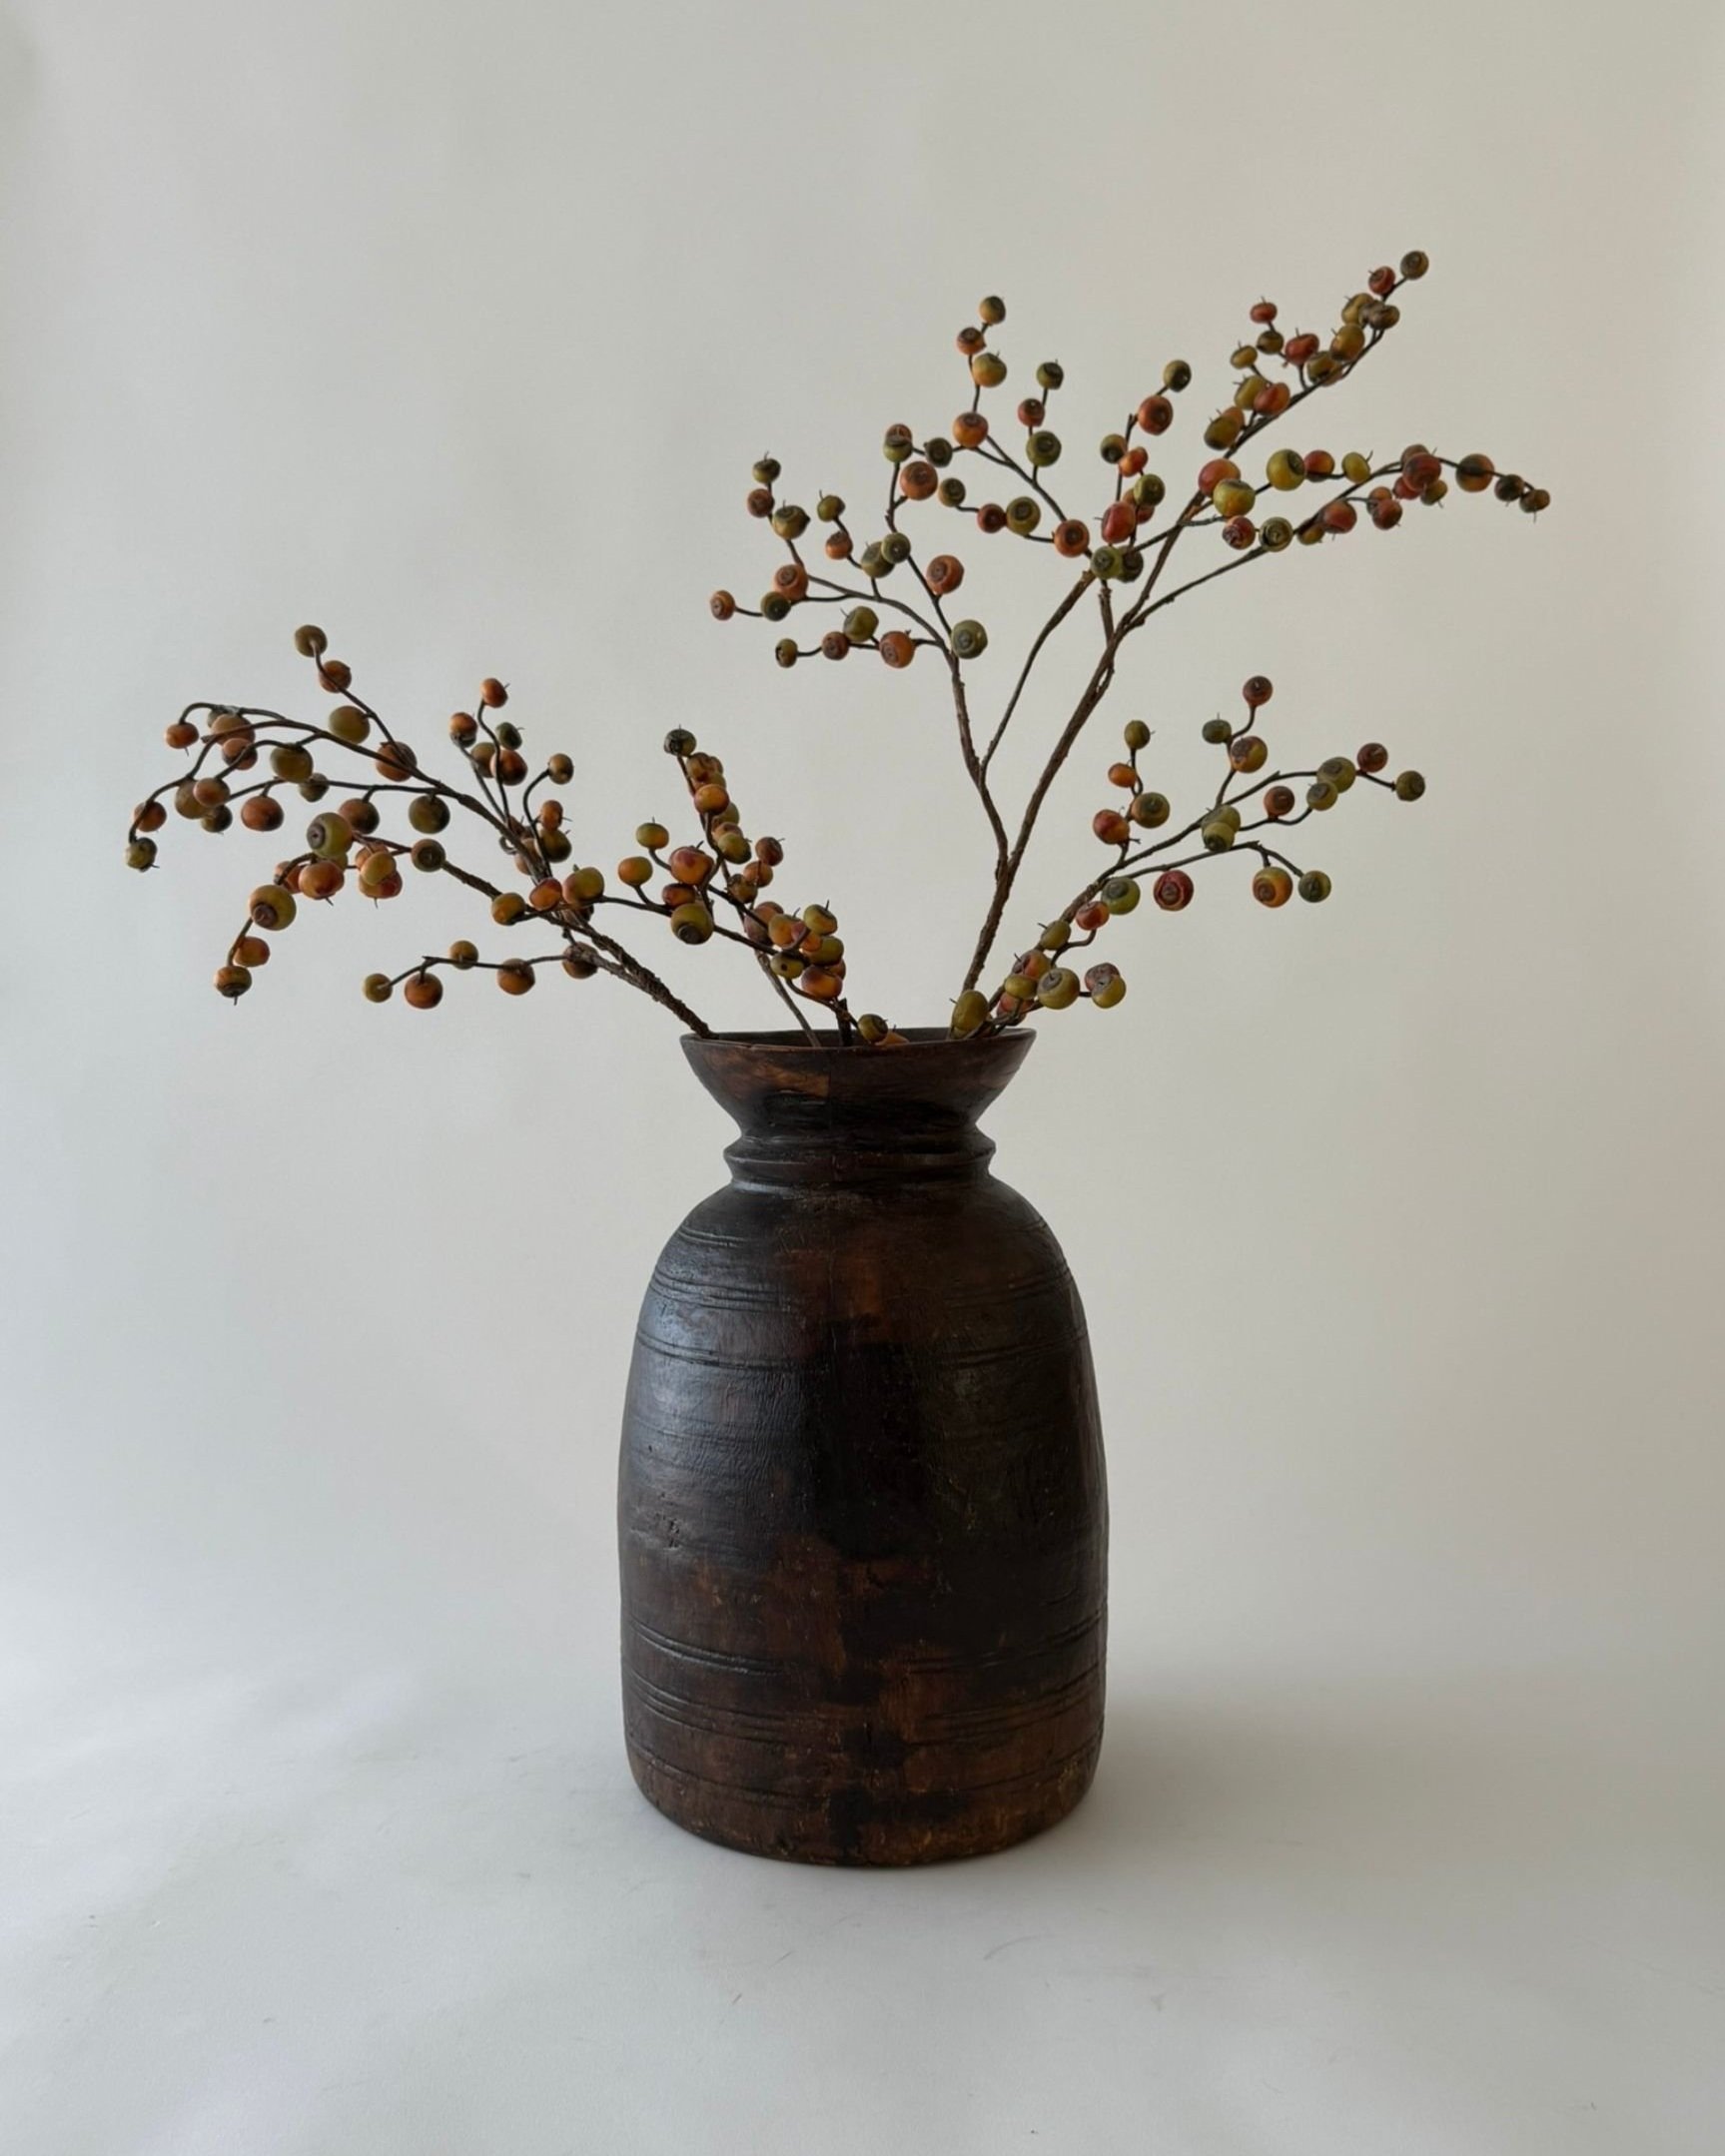
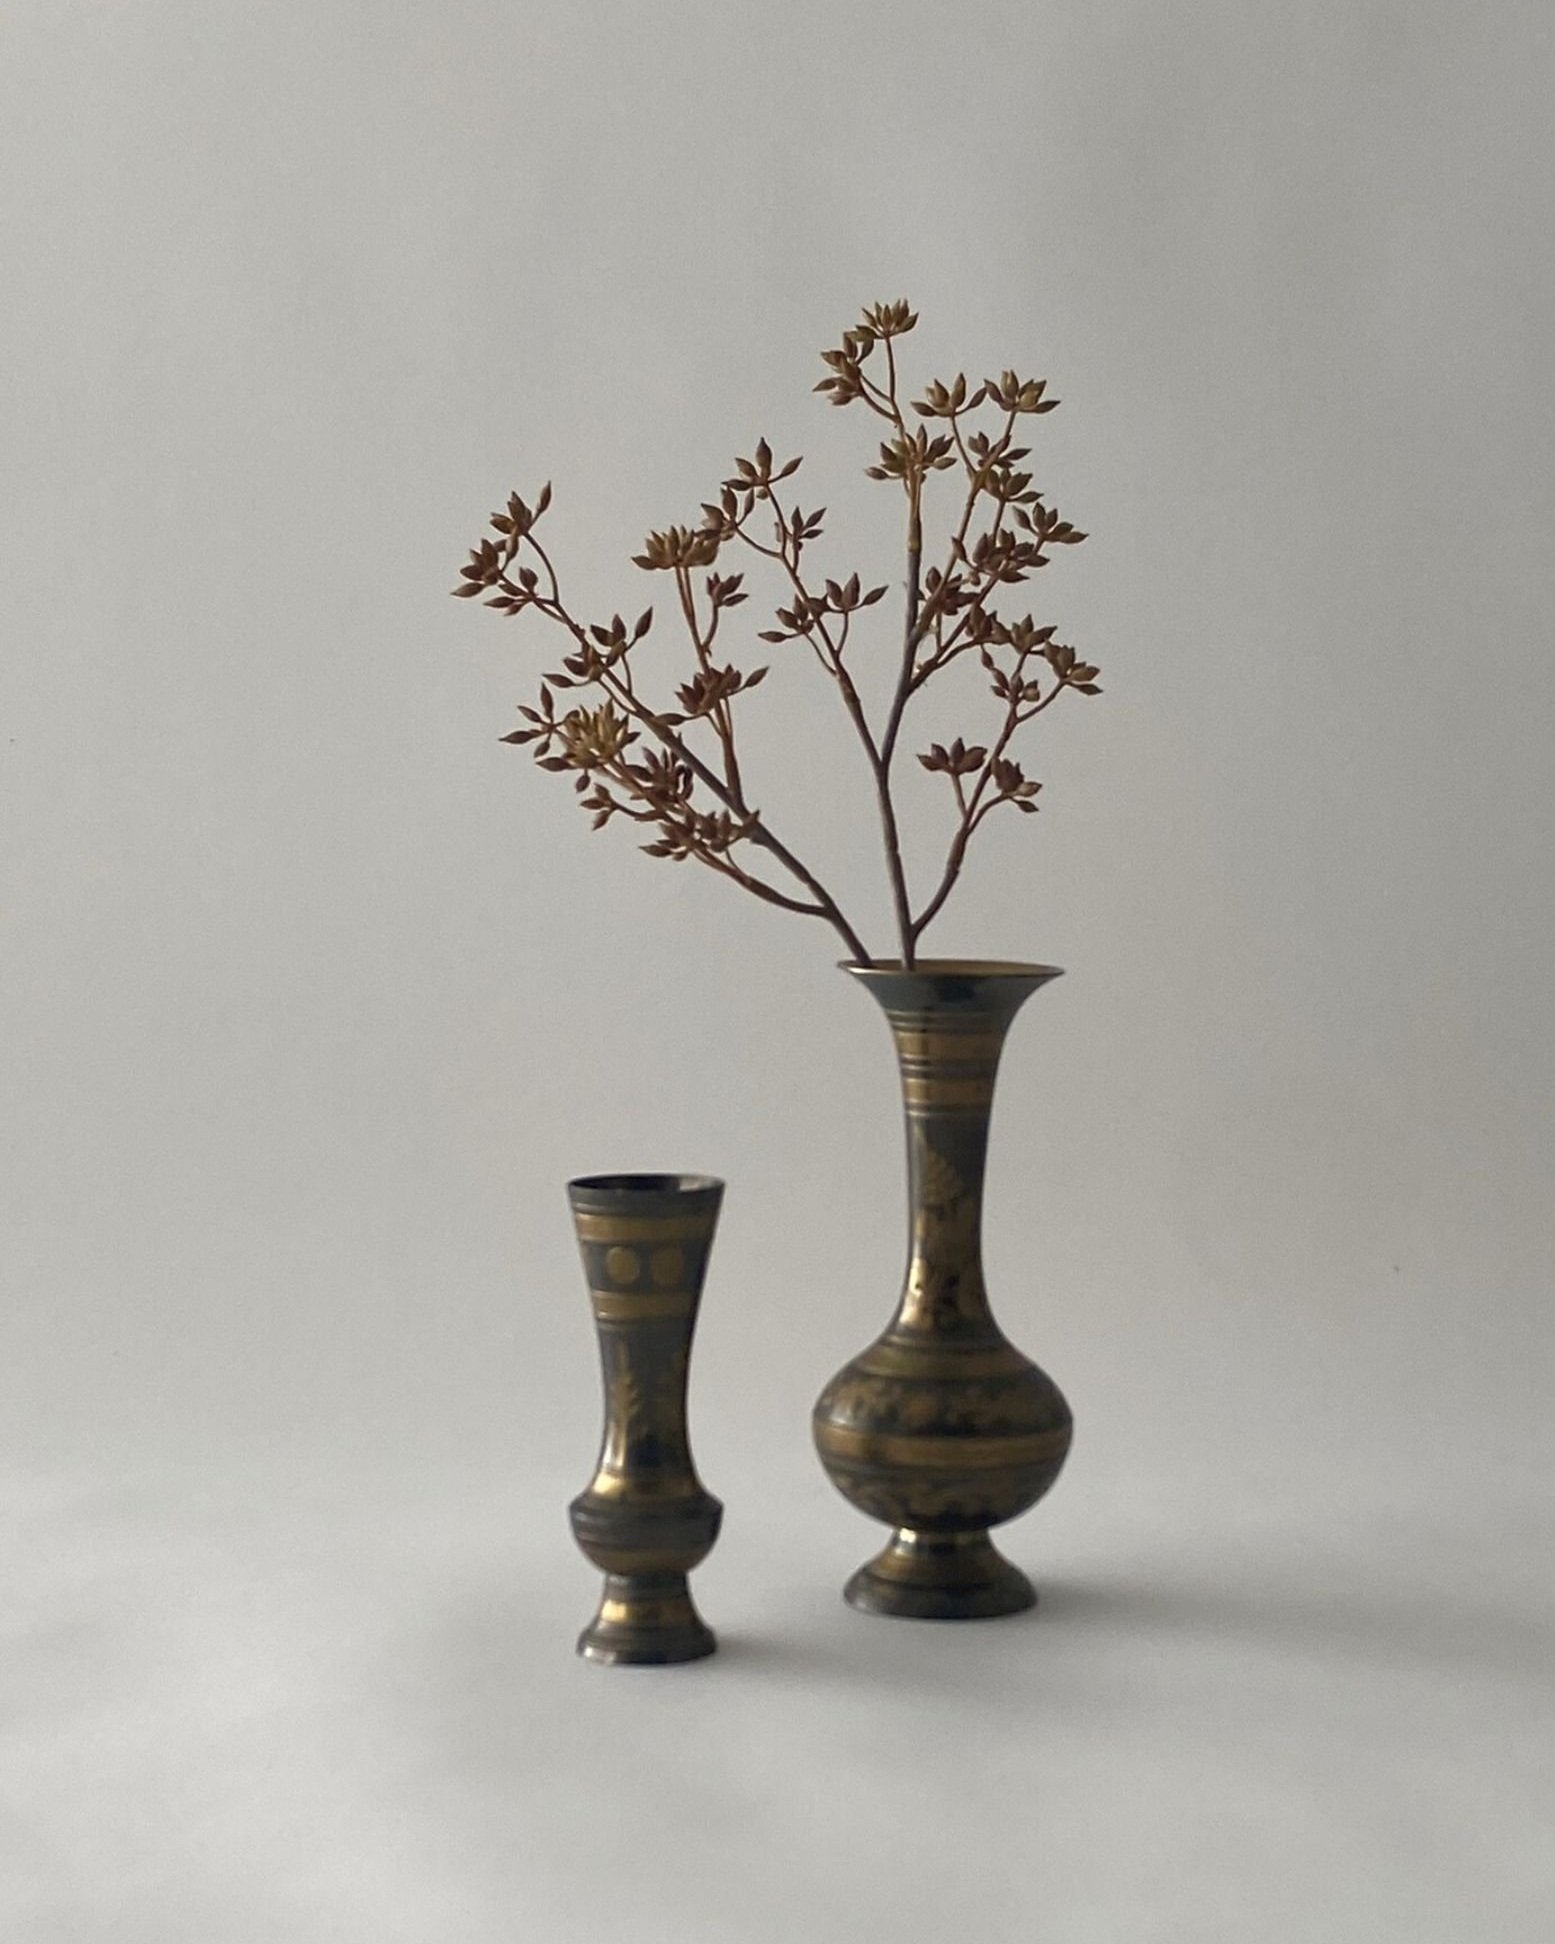
Generally, I like my stems to be at least 1 to 1.5x the height of the vase.
For example, in the photo with the plum stems, the stems are about 1.5x the height of the vase. In the large green centerpiece pictured below, however, the ratio of the stems to the vase is closer to 1:1.
There are always exceptions of course, but this can be a helpful starting point.
For me, it ultimately depends on the area I am wanting to fill, but generally speaking I like the look of taller, oversized arrangements as long as it makes sense in the space.

3. Building the arrangement and the structure. When creating centerpieces, I always like to start with the base (the opening of the vase), which is comprised of the dominate piece of foliage, and what I like to think of as the “filler.”
In the large green centerpiece pictured above, I used the leafy green foliage as the base, which helped to provide structure and fullness overall, and also provided coverage for the opening of the vase.
(optional step) Use floral foam. If you are looking to provide your centerpiece with more form, try using floral foam.
Floral foam creates a foundation for your arrangement and helps hold the stems in place.
Typically, when I am making a larger, fuller arrangement, like the one pictured above, I don't use foam because there are enough filler stems to hold everything in place.
However, if you are struggling to get the foundation you are looking for, this foam is a game changer!
4. Separate your stems. If you’re anything like I was, you may be wanting to keep your florals and stems intact because 1) they’re expensive and 2) you may want to use them differently in the future.
Well, trust me when I say that when you are building a centerpiece, separating them (and cutting them - more on this in tip #5) will make all the difference.
Separating your stems makes them thinner and easier to work with. You can get more precise placement, and as you’re building your arrangement, if you decide to switch some pieces around, you won’t tear up your entire arrangement pulling one stem out (if you know, you know!).
In the large green centerpiece pictured above, all of the accent stems are separated out, which helped me create a fuller and more realistic looking piece overall.
I do want to mention that I don’t always do this step, however. It just depends on the piece.
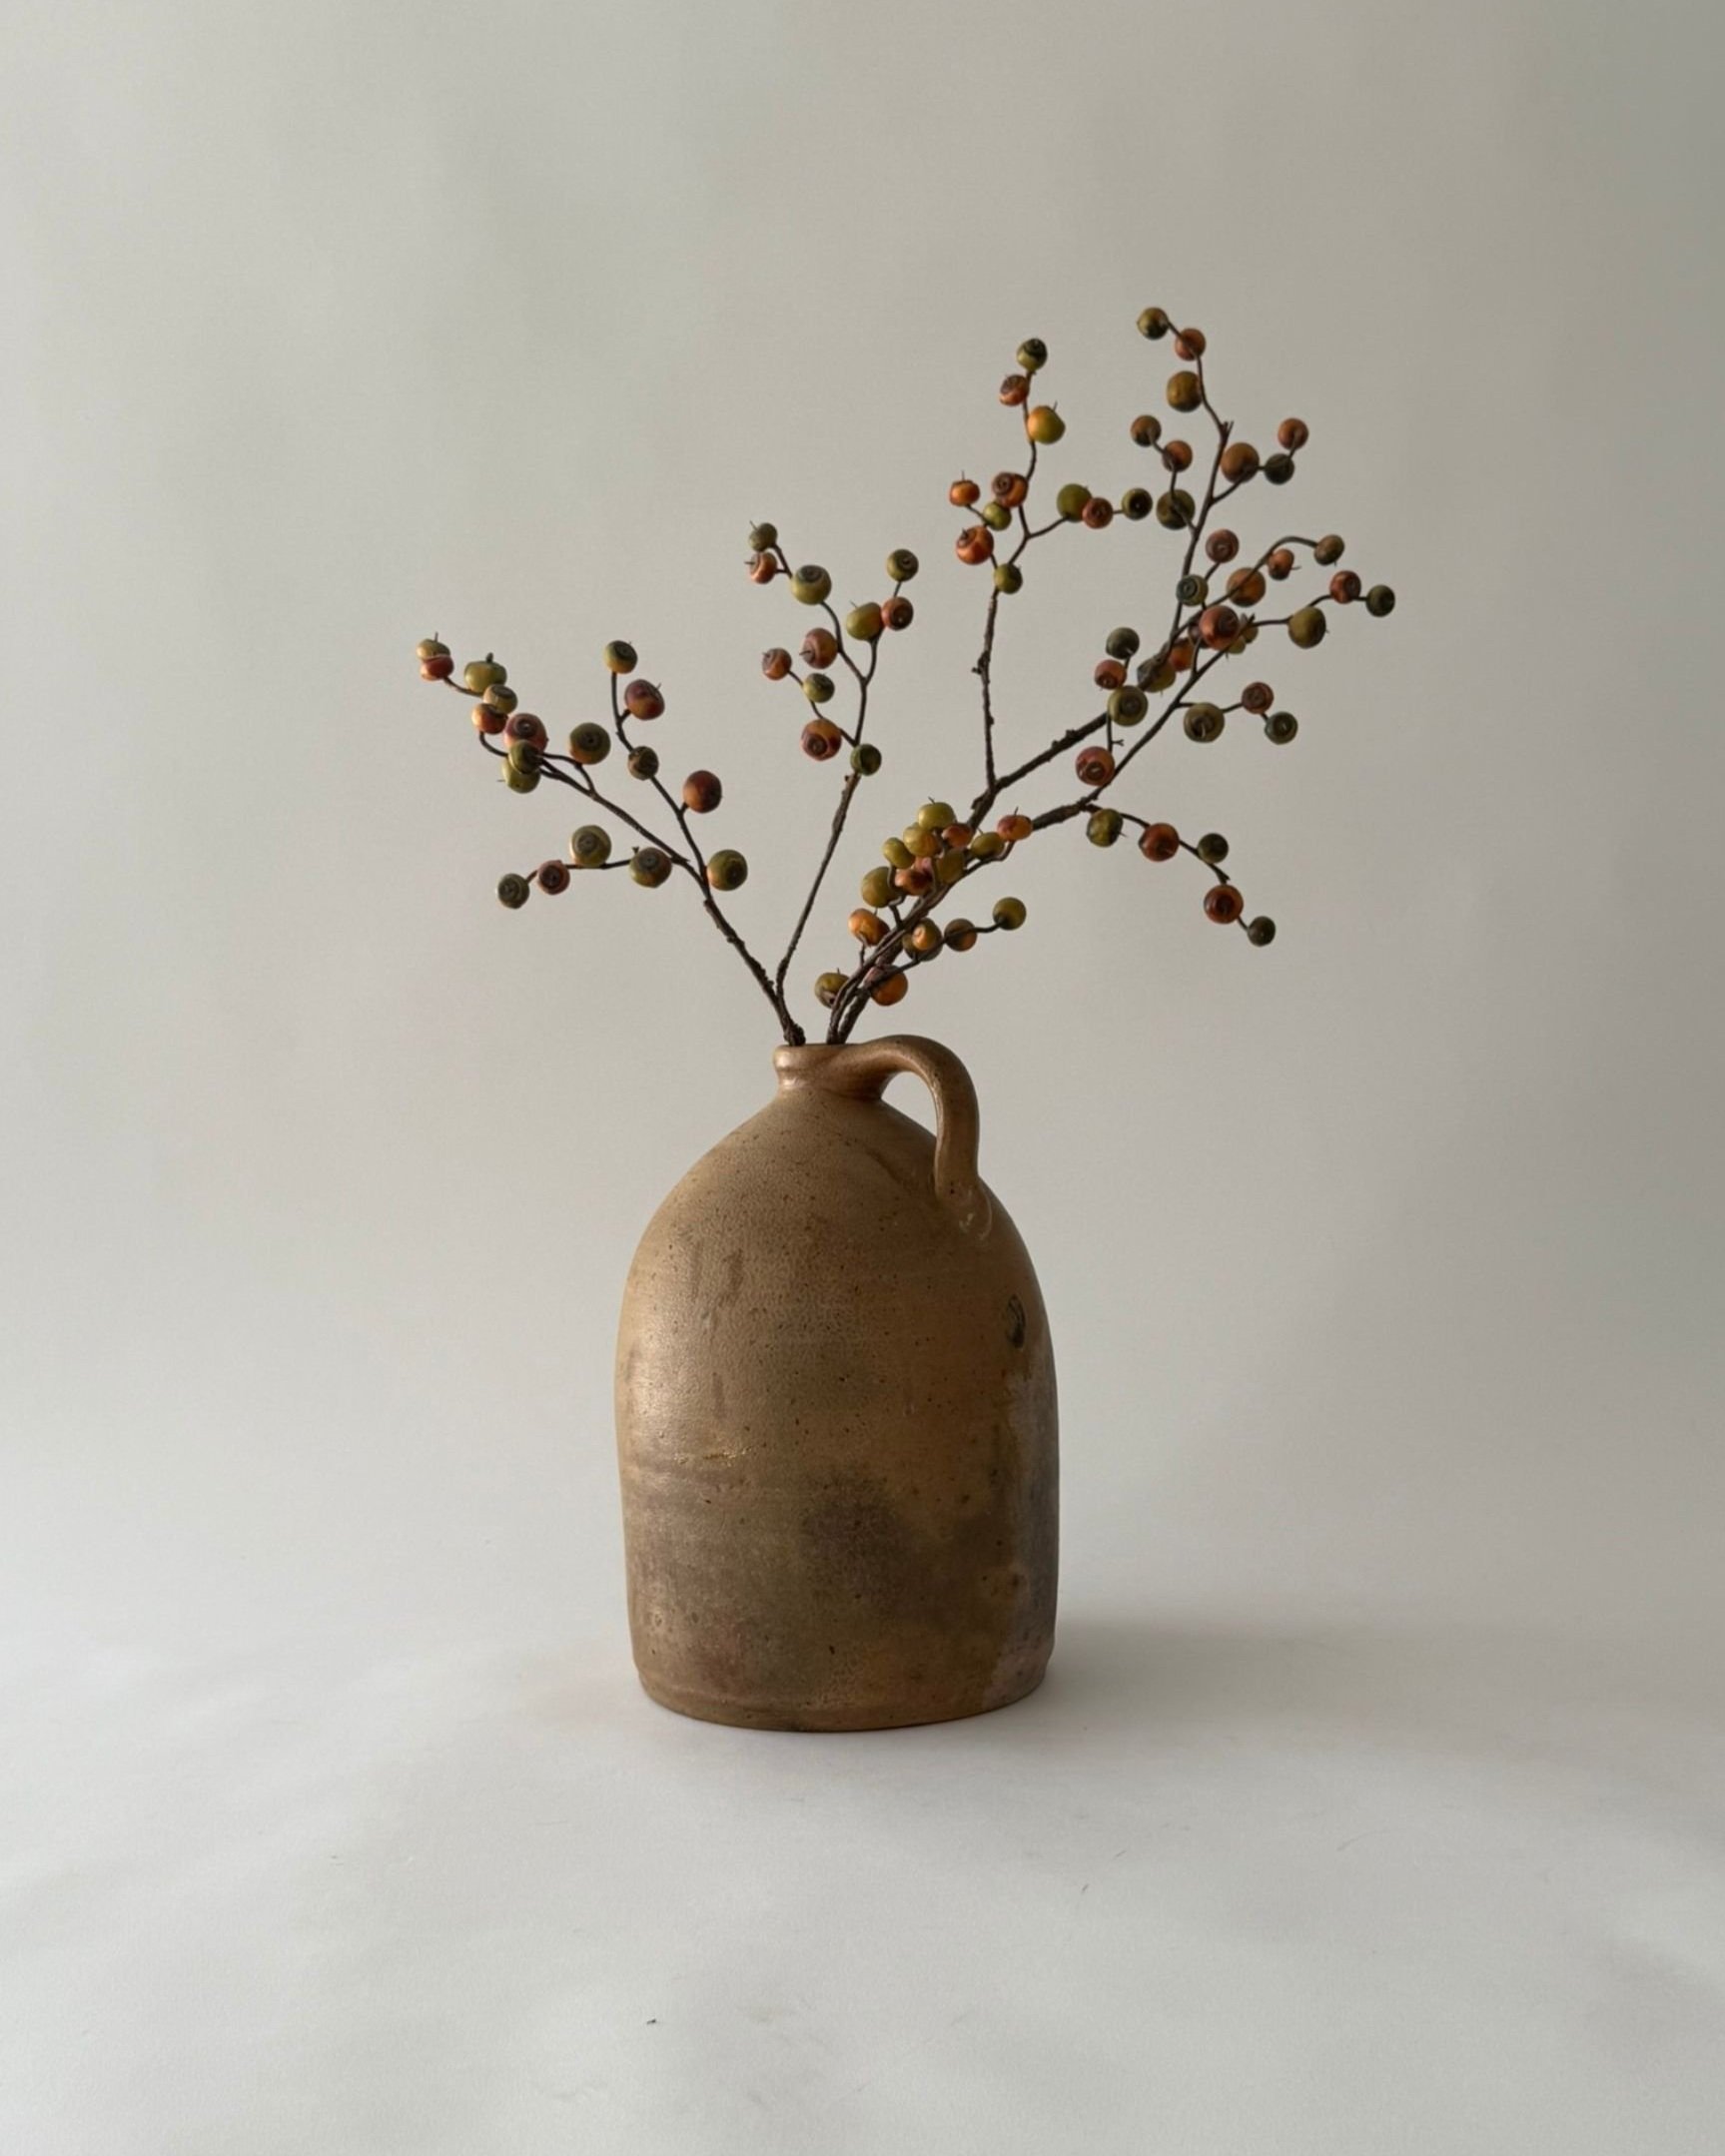
For example, in the photo above with the plum stems where I show the proportion of the vase to the stems, none of the stems are separated. Rather, this arrangement consists of three intact plum cimicifuga stems.
I find that separating stems is most helpful when I am combining several different types of florals/stems into one arrangement.
5. Cut your stems into different lengths. This last tip is absolutely essential and I believe the key to achieving a realistic look overall.
When I am building a centerpiece, I like to focus on giving the piece different layers of movement, allowing some stems to extend slightly beyond others.

Think of how plants naturally grow in nature, the beauty found in their randomness, and aim to bring some of this into your centerpiece.
When I am cutting my florals/stems, I generally use the longest stems slightly offset from the center of the arrangement or at the base (i.e., mouth of the vase) to give the piece a spilling effect.
Where I position the longest stems depends on the overall look and shape I am going for. Again, it all depends on the space but keeping it slightly unpredictable (for example, offsetting the tallest stem) is key to achieving a natural look.
I hope you find these tips useful as you are planning your next centerpiece. Read on if you’re looking for more inspiration and helpful tips. ↓
Find the perfect vintage vases + vessels in the online shop:


Do you have a vessel that you want to give new life to? Learn my favorite technique to DIY your own aged pottery vessel:

On the Blog:
Find more home decorating tips on the blog:
Shop my LTK or visit my Amazon Storefront for more of my finds and favorites.
Like + Follow + Share for more!